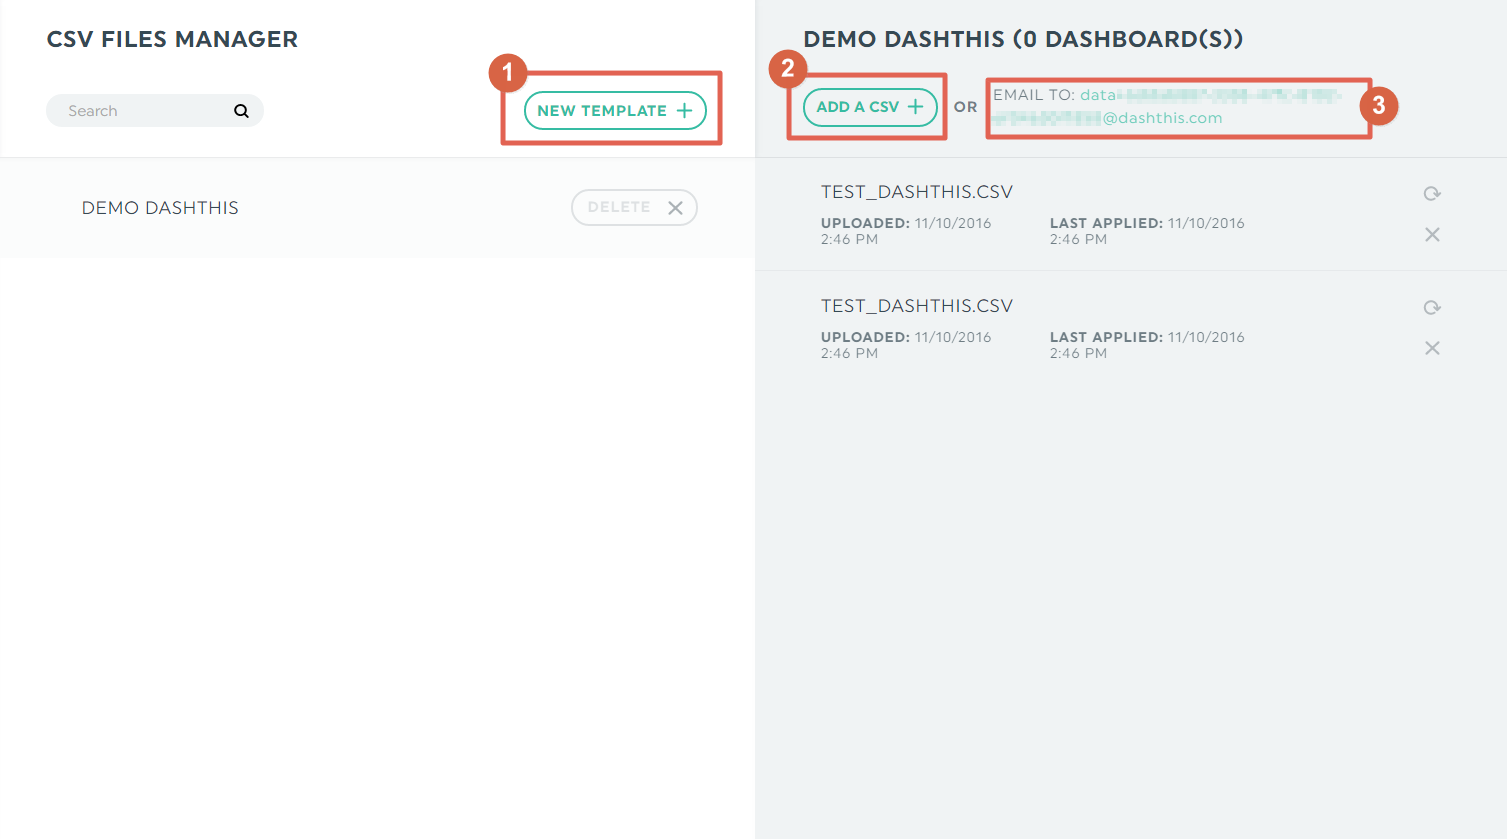
The manager is where you will be able to:
- Create a CSV template
- Upload data from CSV files to DashThis
- Identify the email address to use for the auto email notification
- Manage your previously uploaded CSV files
1 – Create a CSV template
There is a whole article focused on explaining this step: https://help.dashthis.com/how-to-add-a-csv-file-to-a-dashboard
2 – Upload data from CSV files to DashThis
In any case you want fresh data in a widget, you will need to upload your CSV file to DashThis. This can happen right after you create a new widget based on the CSV data source, or when you just received a freshly baked very-custom-super-duper-CSV-report from your favorite in-house tool.
In order to upload a new file, the procedure is pretty straightforward. Choose the CSV file from your computer, then click on Upload.
If the template is correctly defined, and the file fits the template, you shouldn’t see any error here.
If, however, there is an error, please refer to this page to troubleshoot the process.
Error while attempting to parse the date: this is the most common error. There is a difference in the date format, between the template and the uploaded file.
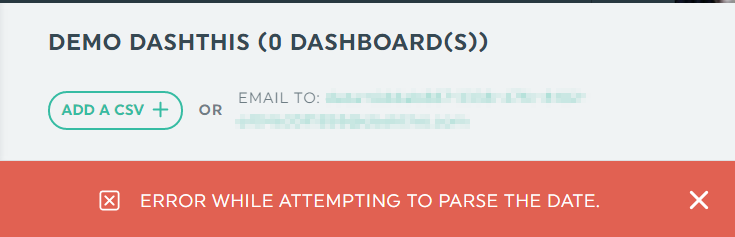
- Incorrect number of days or months (“dd” instead of “d”, for example)
- Incorrect year numbers (“yyyy” instead of “yy”, for example)
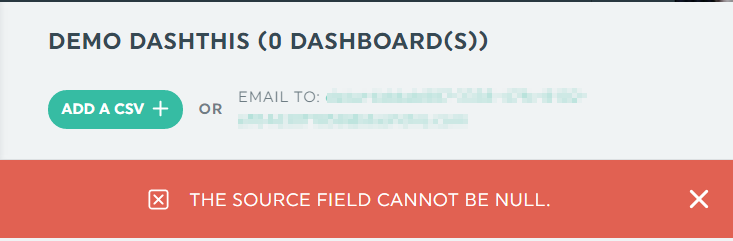
The source field cannot be null.: the cell where the template looks for the Customer ID is empty. This might comes from a difference in the number of lines in the header, for example.
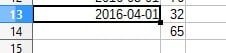
Line X appears too short: this usually comes from a slight difference in the format of the cell compared to the template. For example, defining the date as “yyyy-mm-dd”, and submitting a fle with dates formatted as “yyyy/mm/dd”. DashThis will try to analyze the date, will correctly extract the year, but will stop at the slash (/) separator. The output will be a line too short when comparing with the template.
The date cannot be empty at line XX: one metric doesn’t have a date, or there is a “Total” at the end. Solve this problem by defining a number of footer lines in the template.
3 – Identify the email address to use for the auto email notification
The procedure is explained in the following article: https://help.dashthis.com/send-by-mail-csv-files-manager
4 – Manage your previously uploaded CSV files
By selecting one of your template, you can see the list of previously uploaded CSV files. From there, you can obtain various information on the files, as well as two interesting actions :

- Resend : this will re-upload the file to DashThis. Very useful to populate a just created a new widget with the same CSV data source.
- Delete: Self-explaining, this will remove the uploaded file. Deleting a file will not remove data from dashboards.
