
💡Tip: If your dashboard is a periodic report, for example, a monthly dashboard, you don't need to clone it to see another month. Use the drop-down menu at the top of your dashboard to browse to the period you want. You can view up to 13 months of historical data this way.
On the first day of a month, it's normal not to see the new month yet. DashThis always uses the last completed day to determine the period. For example, on December 1st, the last completed day is November 30th, so your monthly dashboard still shows November.
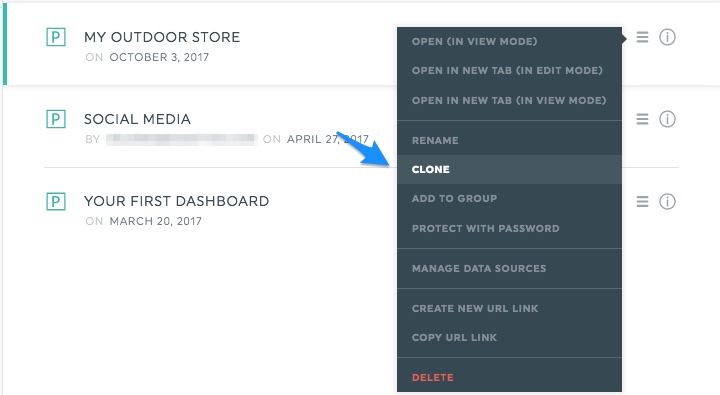
1- In the Dashboard Manager, find the dashboard you want to modify.
2- Click on the icon menu and select the option “Clone”
3- Choose the data sources you want to include in your dashboard and click “Save”
4- A section appears on the right side. This is where you can change the timeframe. Select the new period you want to measure.
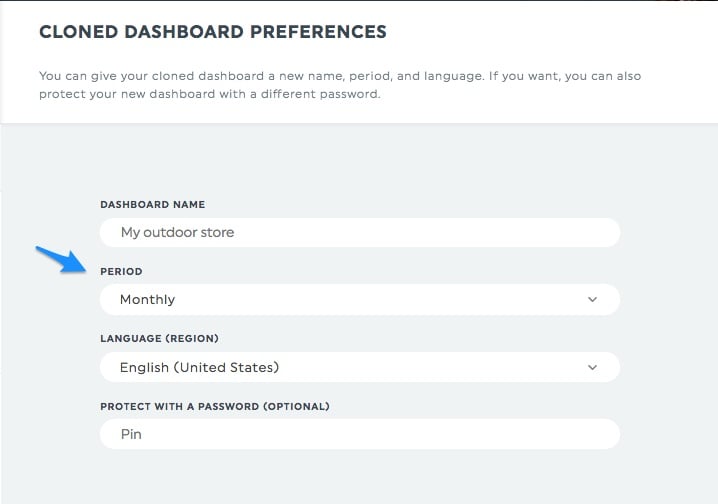
5- Click “Clone dashboard” and you’re done! You can find your dashboard with the new time period in the Dashboard Manager! It’ll have the exact same widgets, but the date, so the data, will be different.
Easy, eh?
💡 Tip: If what you need is one dashboard showing several months at once, for example six months broken down month over month, do not clone the dashboard. Enable the Flexible Period feature instead, set the period to the range you want, and set Show by to Month. See how to show six months of data month by month.
